navCenter - Graphic Views
navCenter offers several Compass views with powerful features and, as well as reading the information on this page, you may find it helpful watch the accompanying video.
How to use and customise navCenter's Compass.
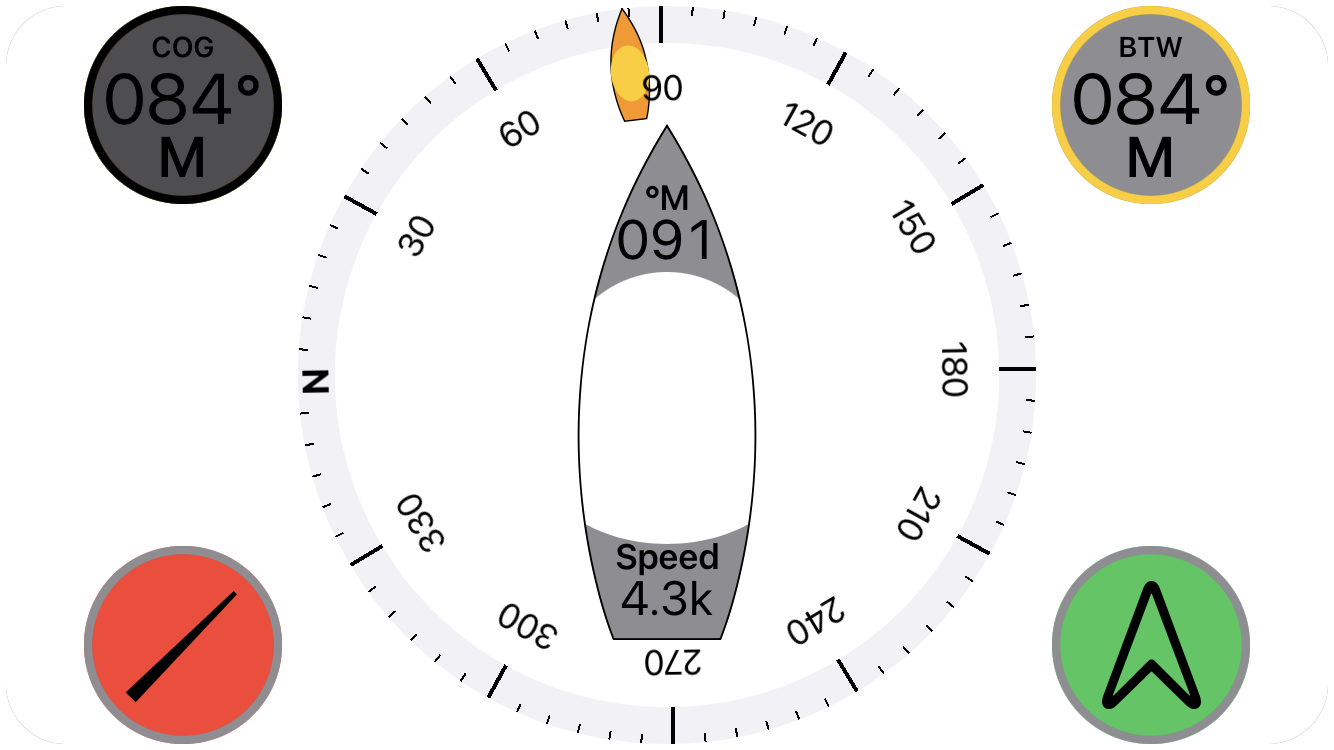
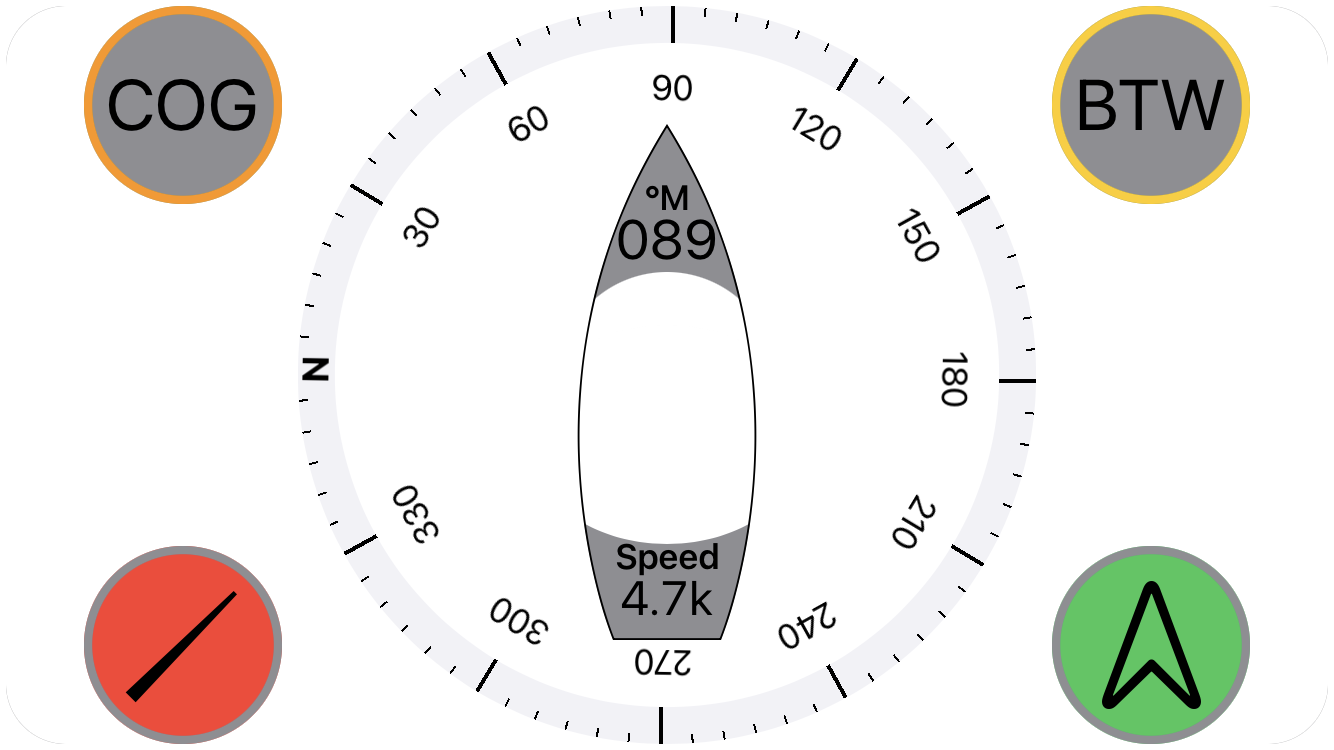
Compass Standard
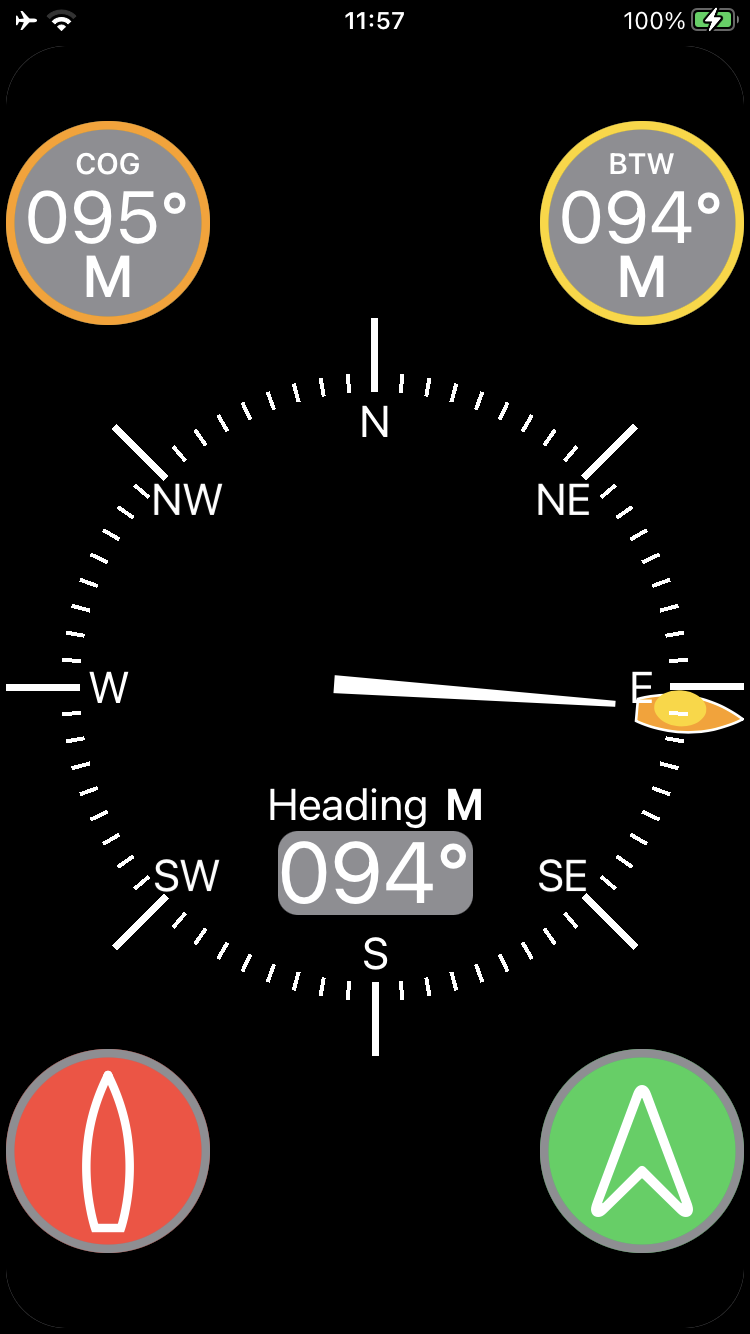
The Standard compass is shown here presented in 'Head Up' mode where the compass pointer is fixed and the dial rotates to indicate the boat's heading and "North Up" and mode where the dial is fixed and the needle rotates to indicate the boat's heading.
On the compass gauge the boat's Course Over the Ground (COG) is indicated by the orange boat and the Bearing To Waypoint (BTW) is indicated by the yellow ellipse. Thus, at a glance, it is clear to see how the boat's course needs to by adjusted in order to make the waypoint.
The boat's heading is displayed at the bow of the central pointer and the boat's speed through the water (STW) or Speed over the ground (SOG) at the stern when in "Head Up" mode and when in "North Up" mode only the boat's heading is shown within the compass dial.
The button in the centre of the Compass toggles the compass between True and Magnetic values. When displaying True values the gauge and the button are tinted with a light blue colour.
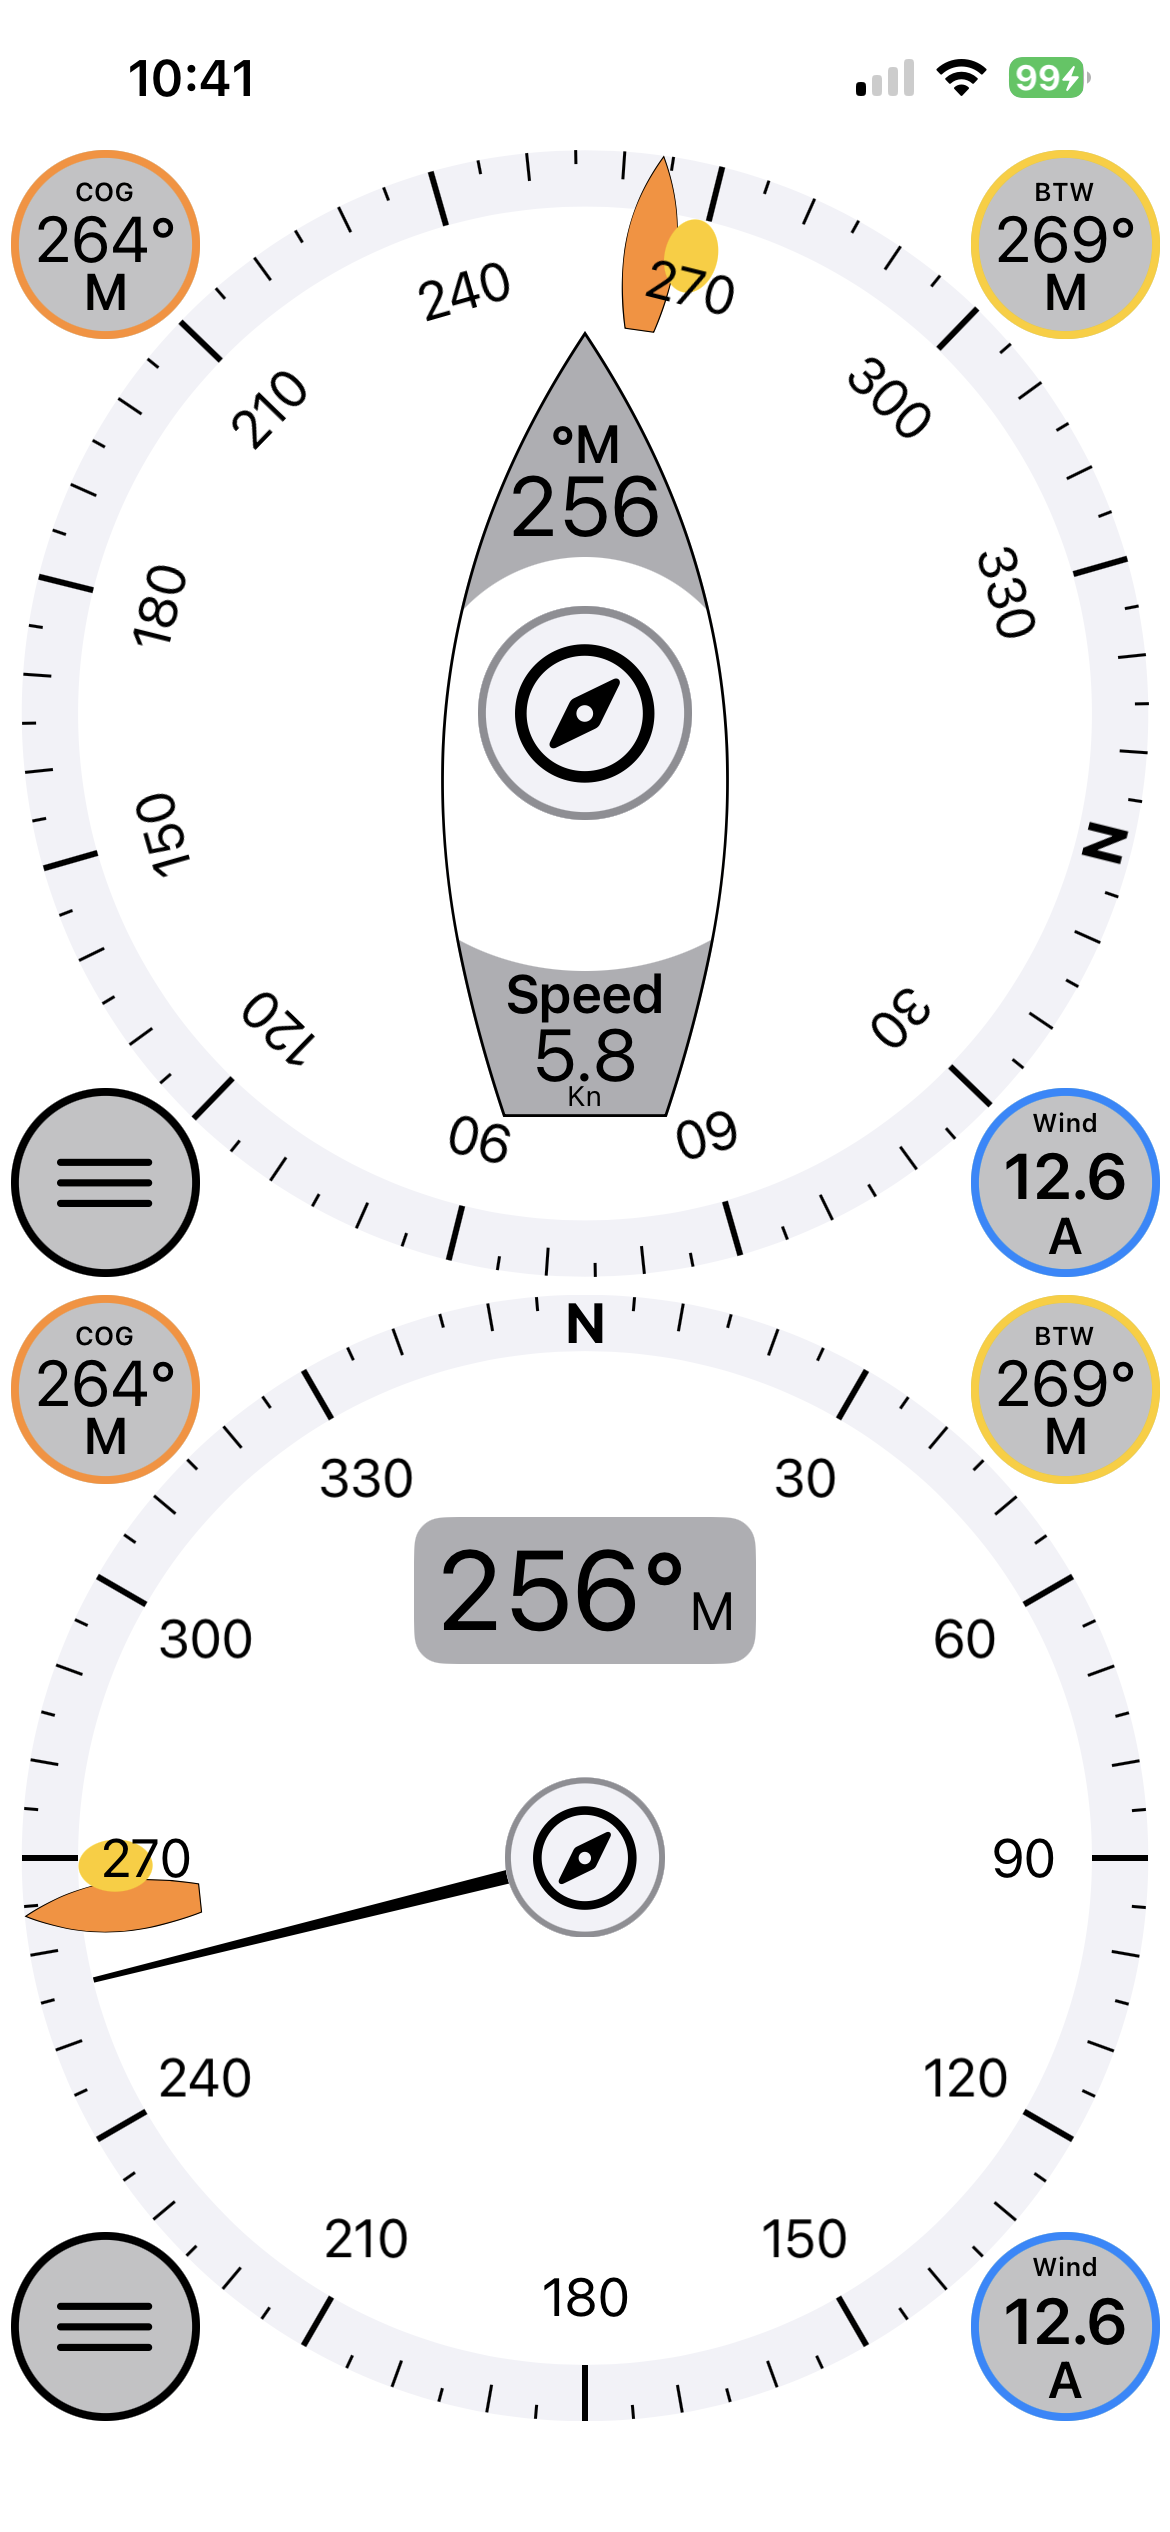
Within the compass View the boat's Course Over the Ground (COG) is displayed in the Data button in the top left hand corner and graphically by the orange boat icon on the compass gauge. The boat's Bearing To Waypoint is displayed in the Data button at the top right hand corner and graphically by the yellow ellipse on the compass gauge. Apparent Wind is displayed in the Data button at the bottom right hand corner.
Tapping a Data button will cause a PopUp View to be displayed containing additional data related to that button.
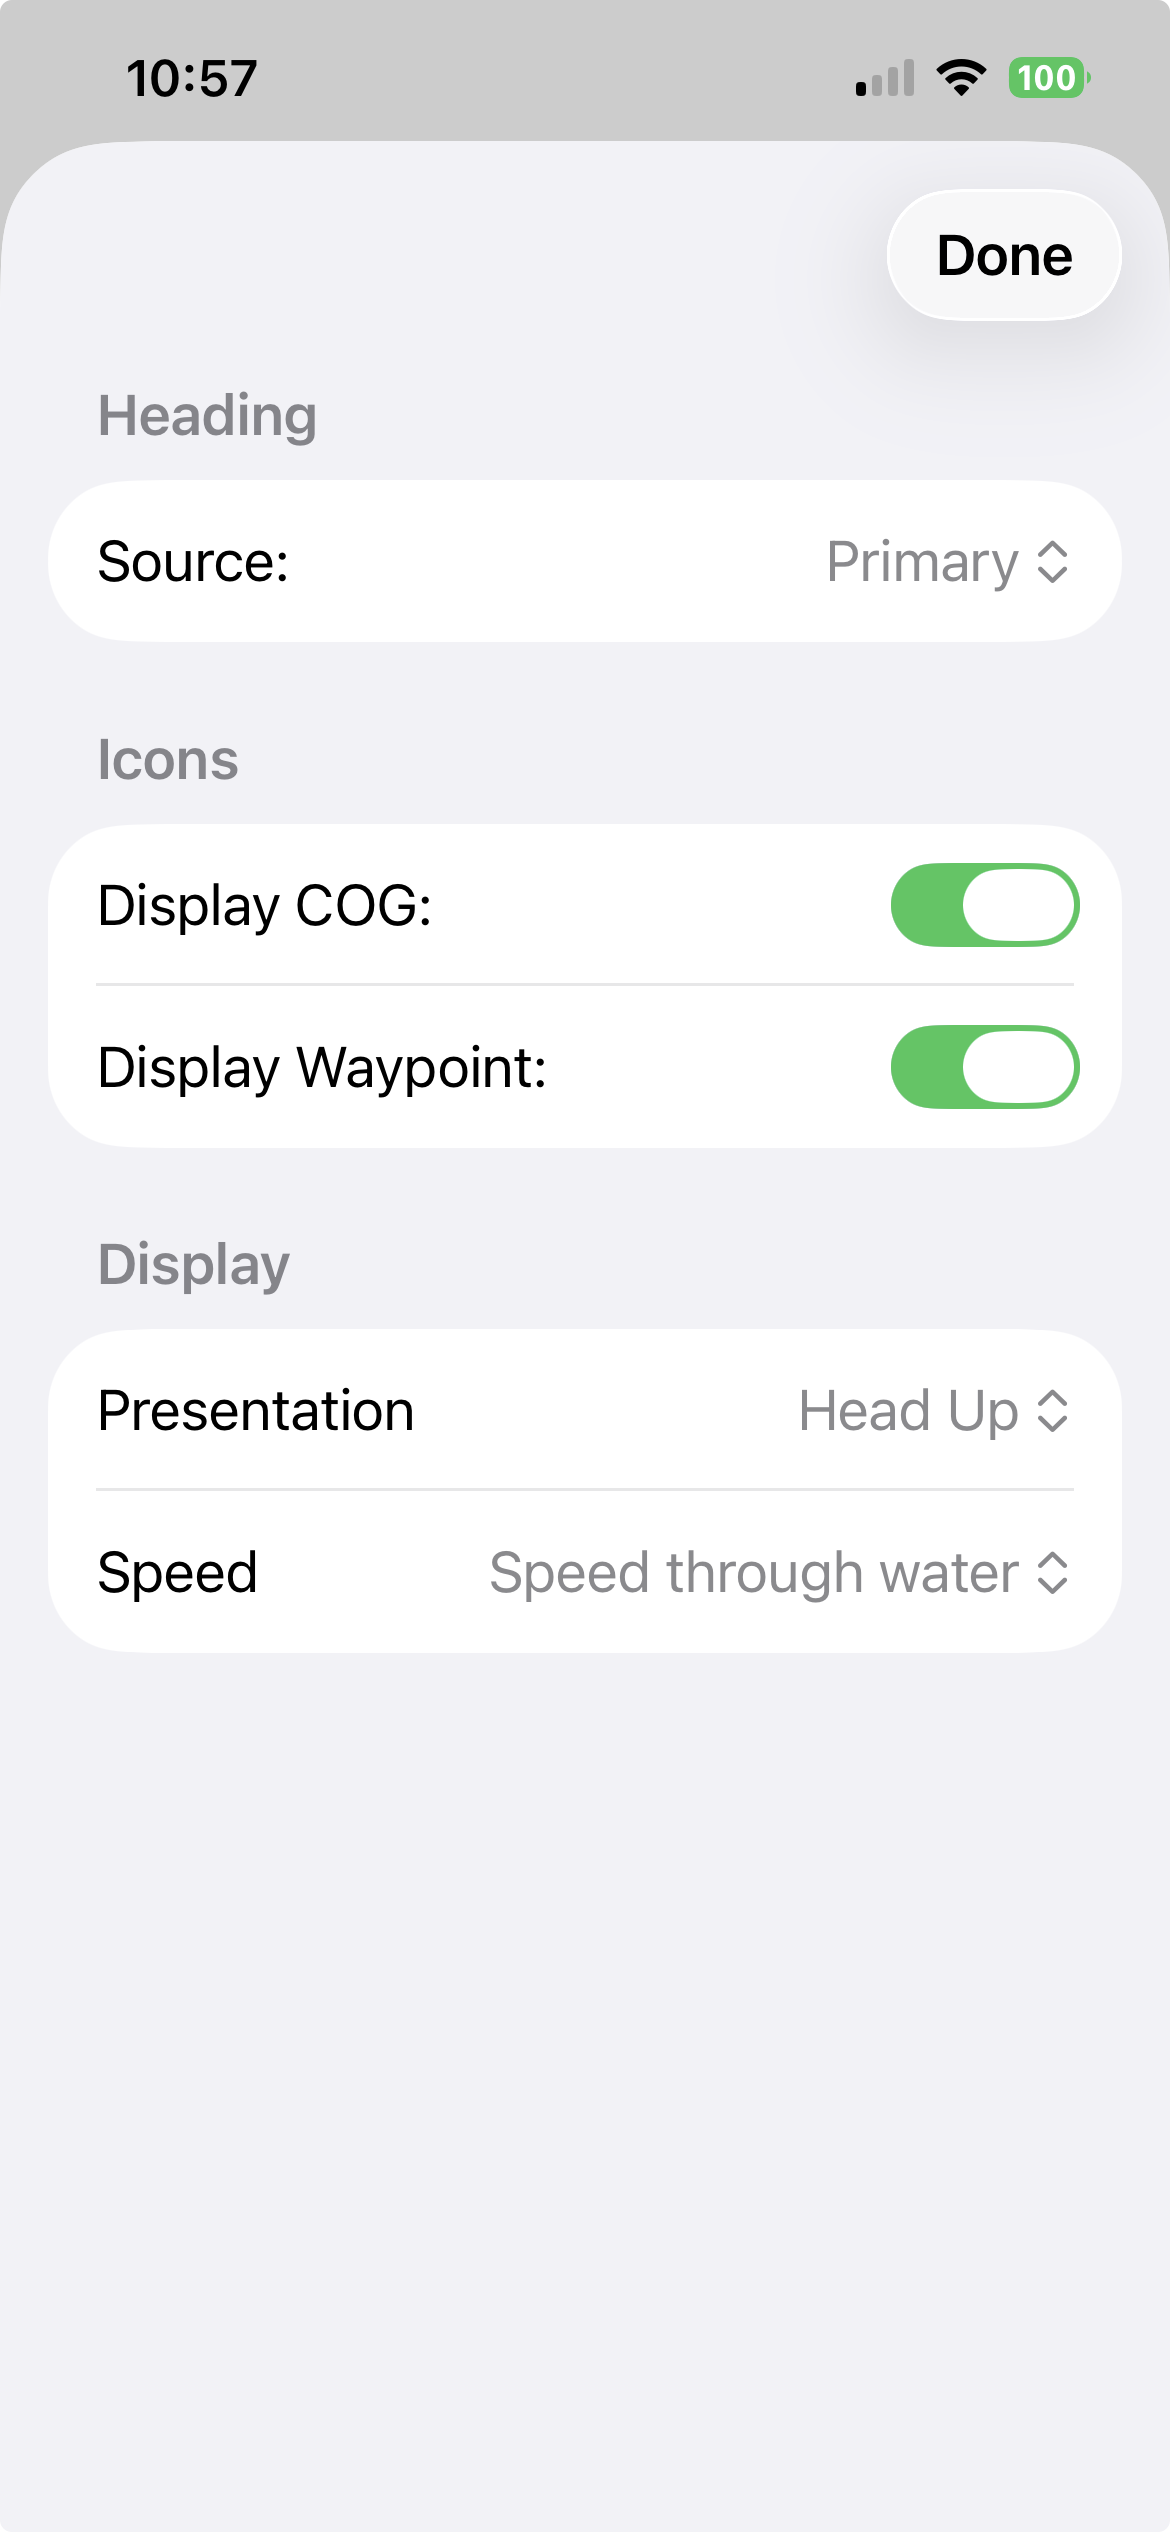
Tapping the Menu button in the bottom left of the Compass View displays the settings that may be changed for that View of the compass.
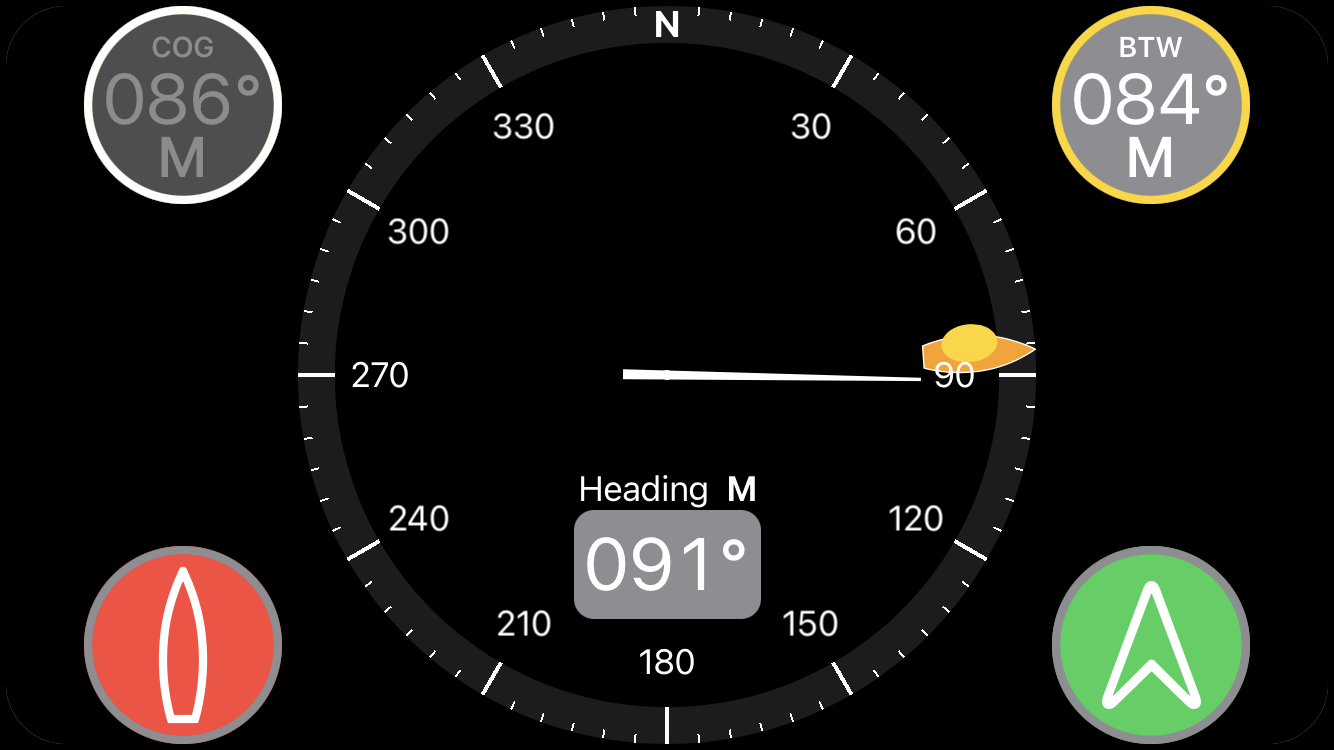
Compass Compact
Shown here in Dark mode is the Compact Compass which was specifically designed to be used on the Apple Watch. However it has proved to be such a useful view that many people use it on their larger devices.
The Data buttons and Menu button all work exactly as they do for the Standard Compass however the Compact Compass is only ever displayed in "Head Up" mode.
The Data Views below the compass are monitoring various batteries and fluid tanks on the boat along with the temperature of the water that the boat is floating in. nC's app Settings control what units are used to display capacity and temperature.
A boat may contain multiple Battery Banks, Tanks etc. This situaton is catered for within NMEA 2000 by setting a value called "Data Instance" for each occurance of a batery, tank etc.
Click the following link for more information on handling Tanks and Battery Banks.
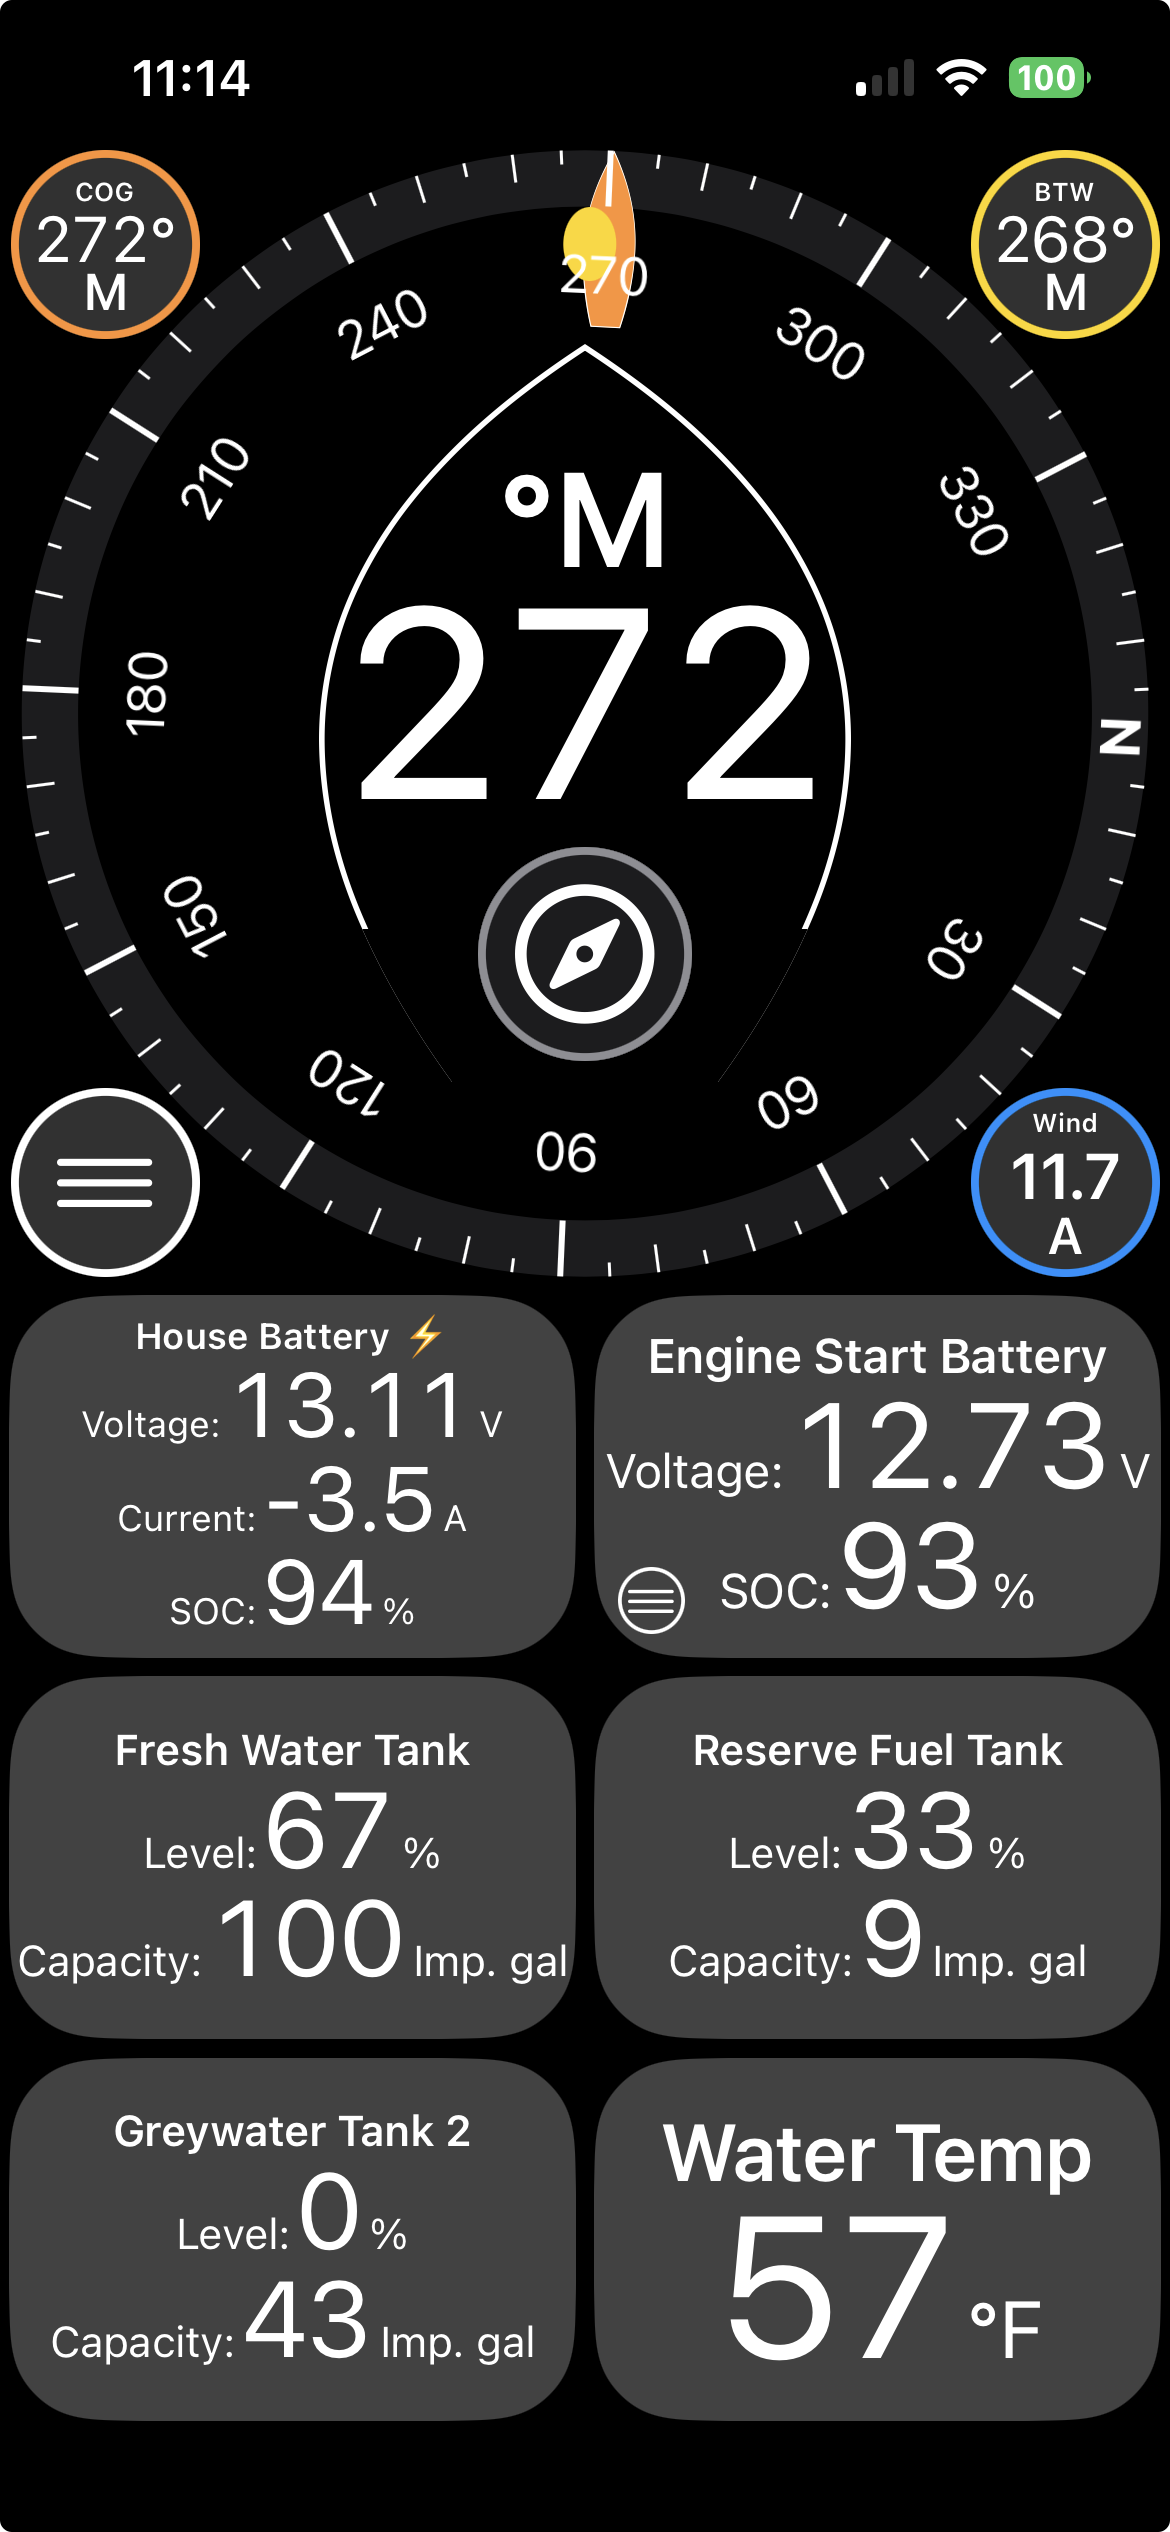
Views that deal with devices that may have multiple instances contain a menu allowing the device to be linked to the correct NMEA instance and also to be given a meaninful name.
This menu is normally hidden but is exposed by a long press on the view itself. The titled "Engine Start Battery" is shown displaying its menu button. Tapping that button will activate the menu.
The following link is to a very helpful video demonstrating how to use and customise navCenter's Compass.
Apparent Wind Gauge
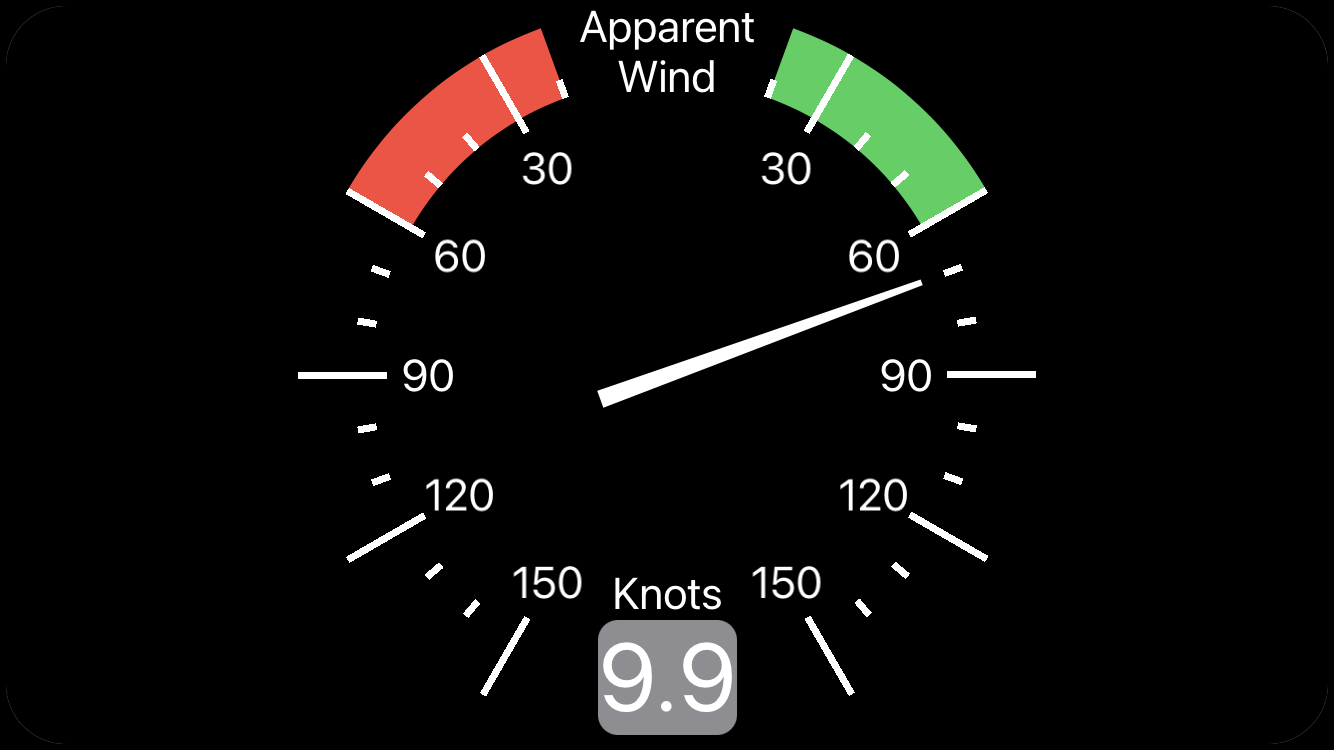
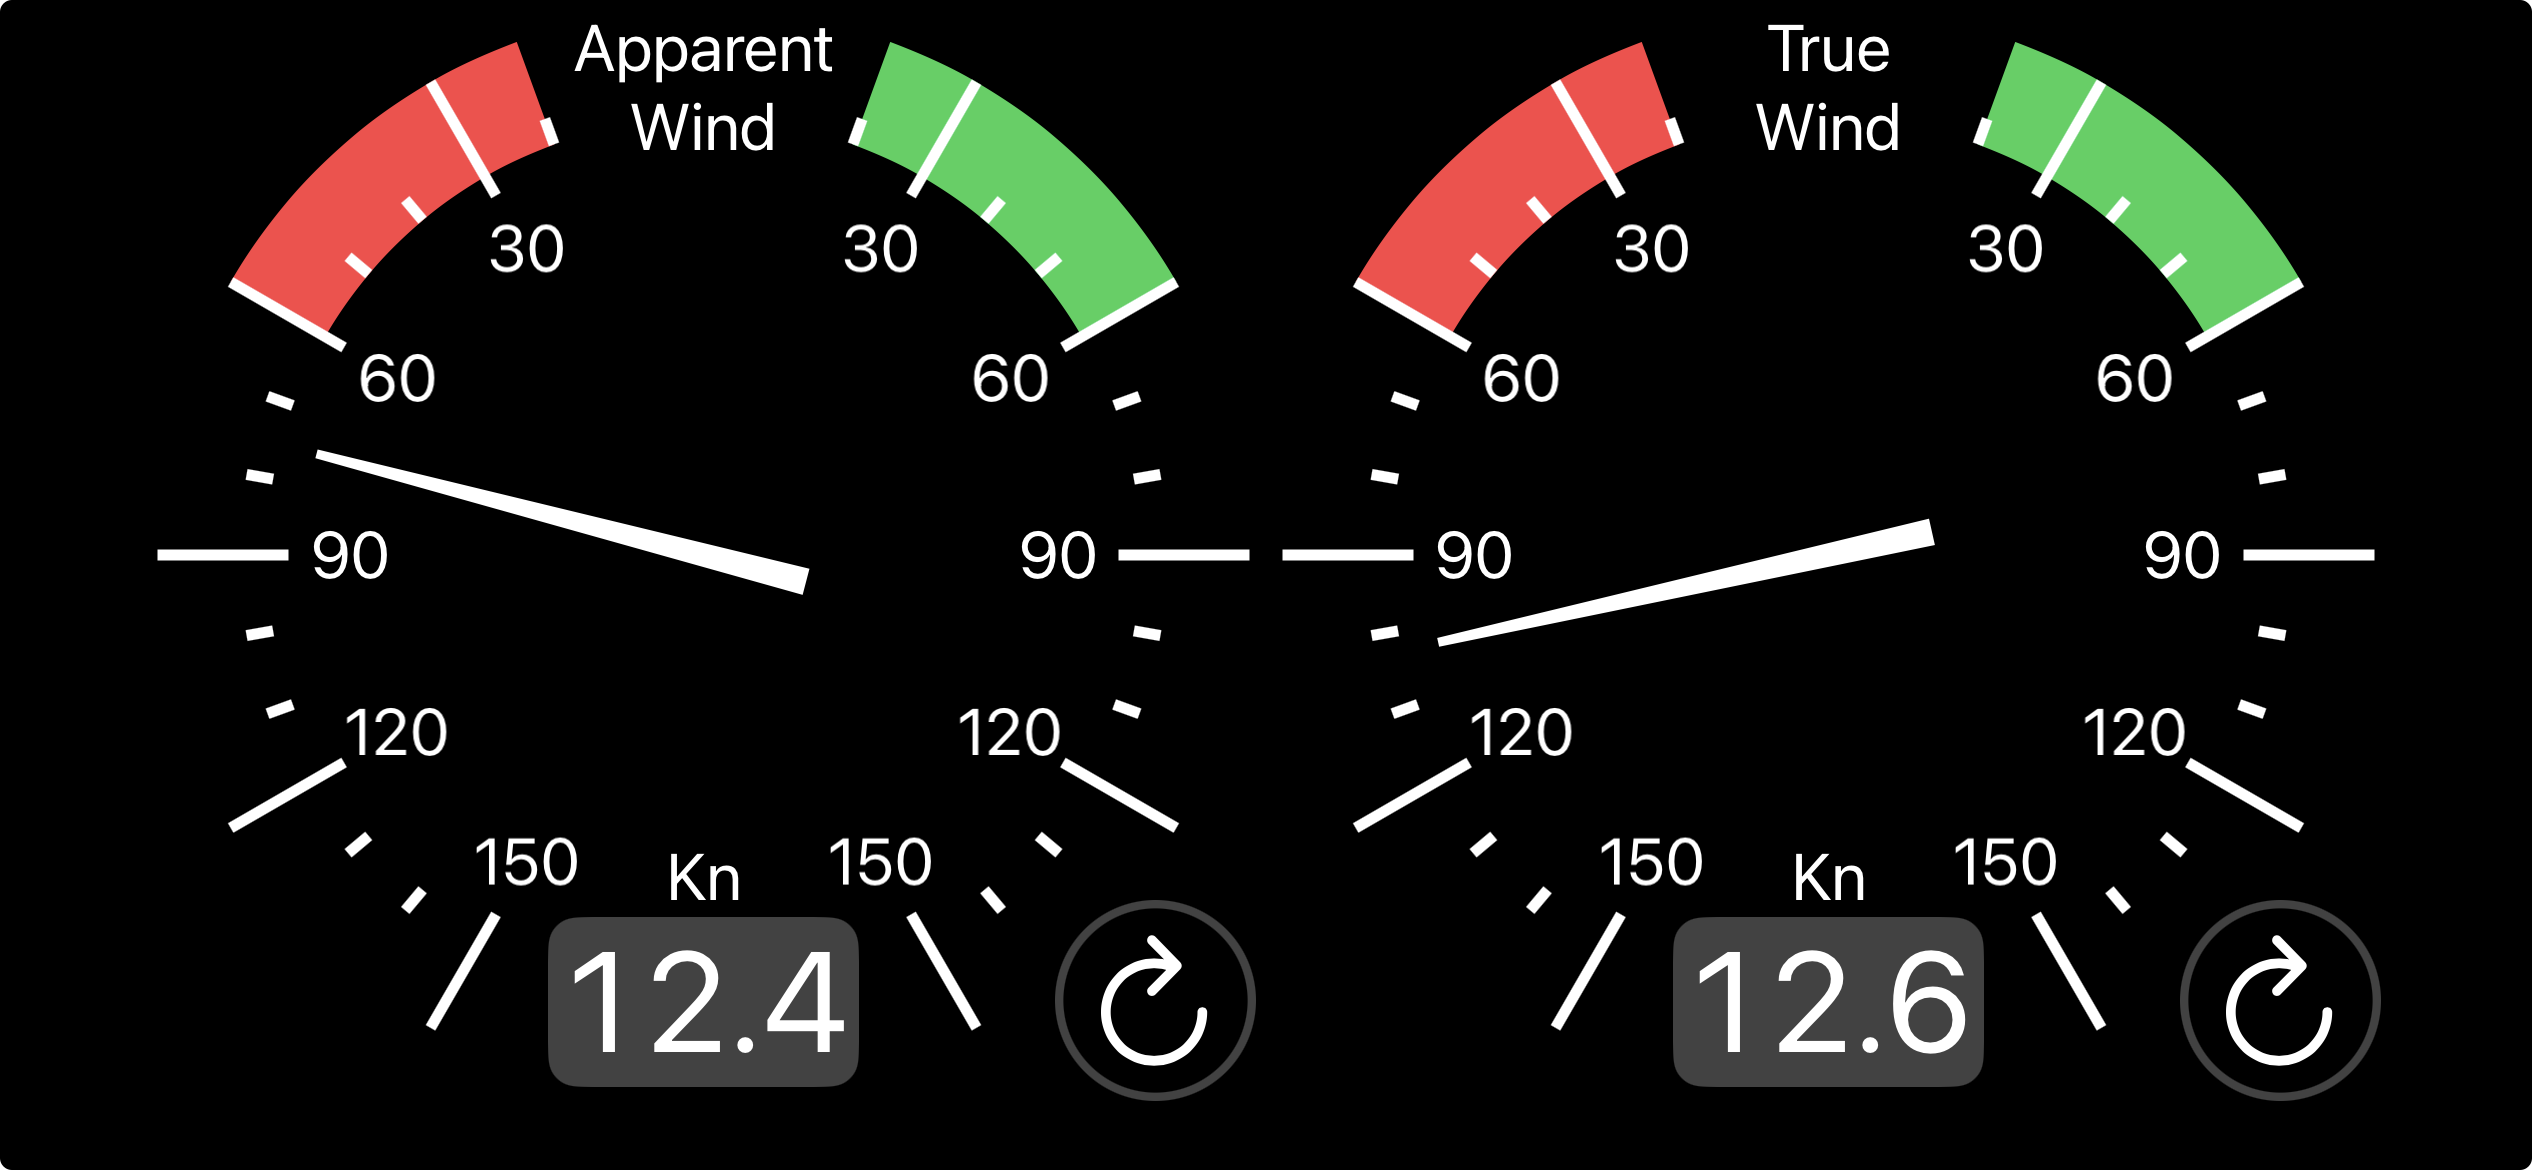
This view presents the apparent wind direction and speed in a graphical format that will be familiar to many people.
Tapping on the Button on the bottom right of the view will cycle the gauge to display Apparent, True or Ground wind.
Autopilot Control
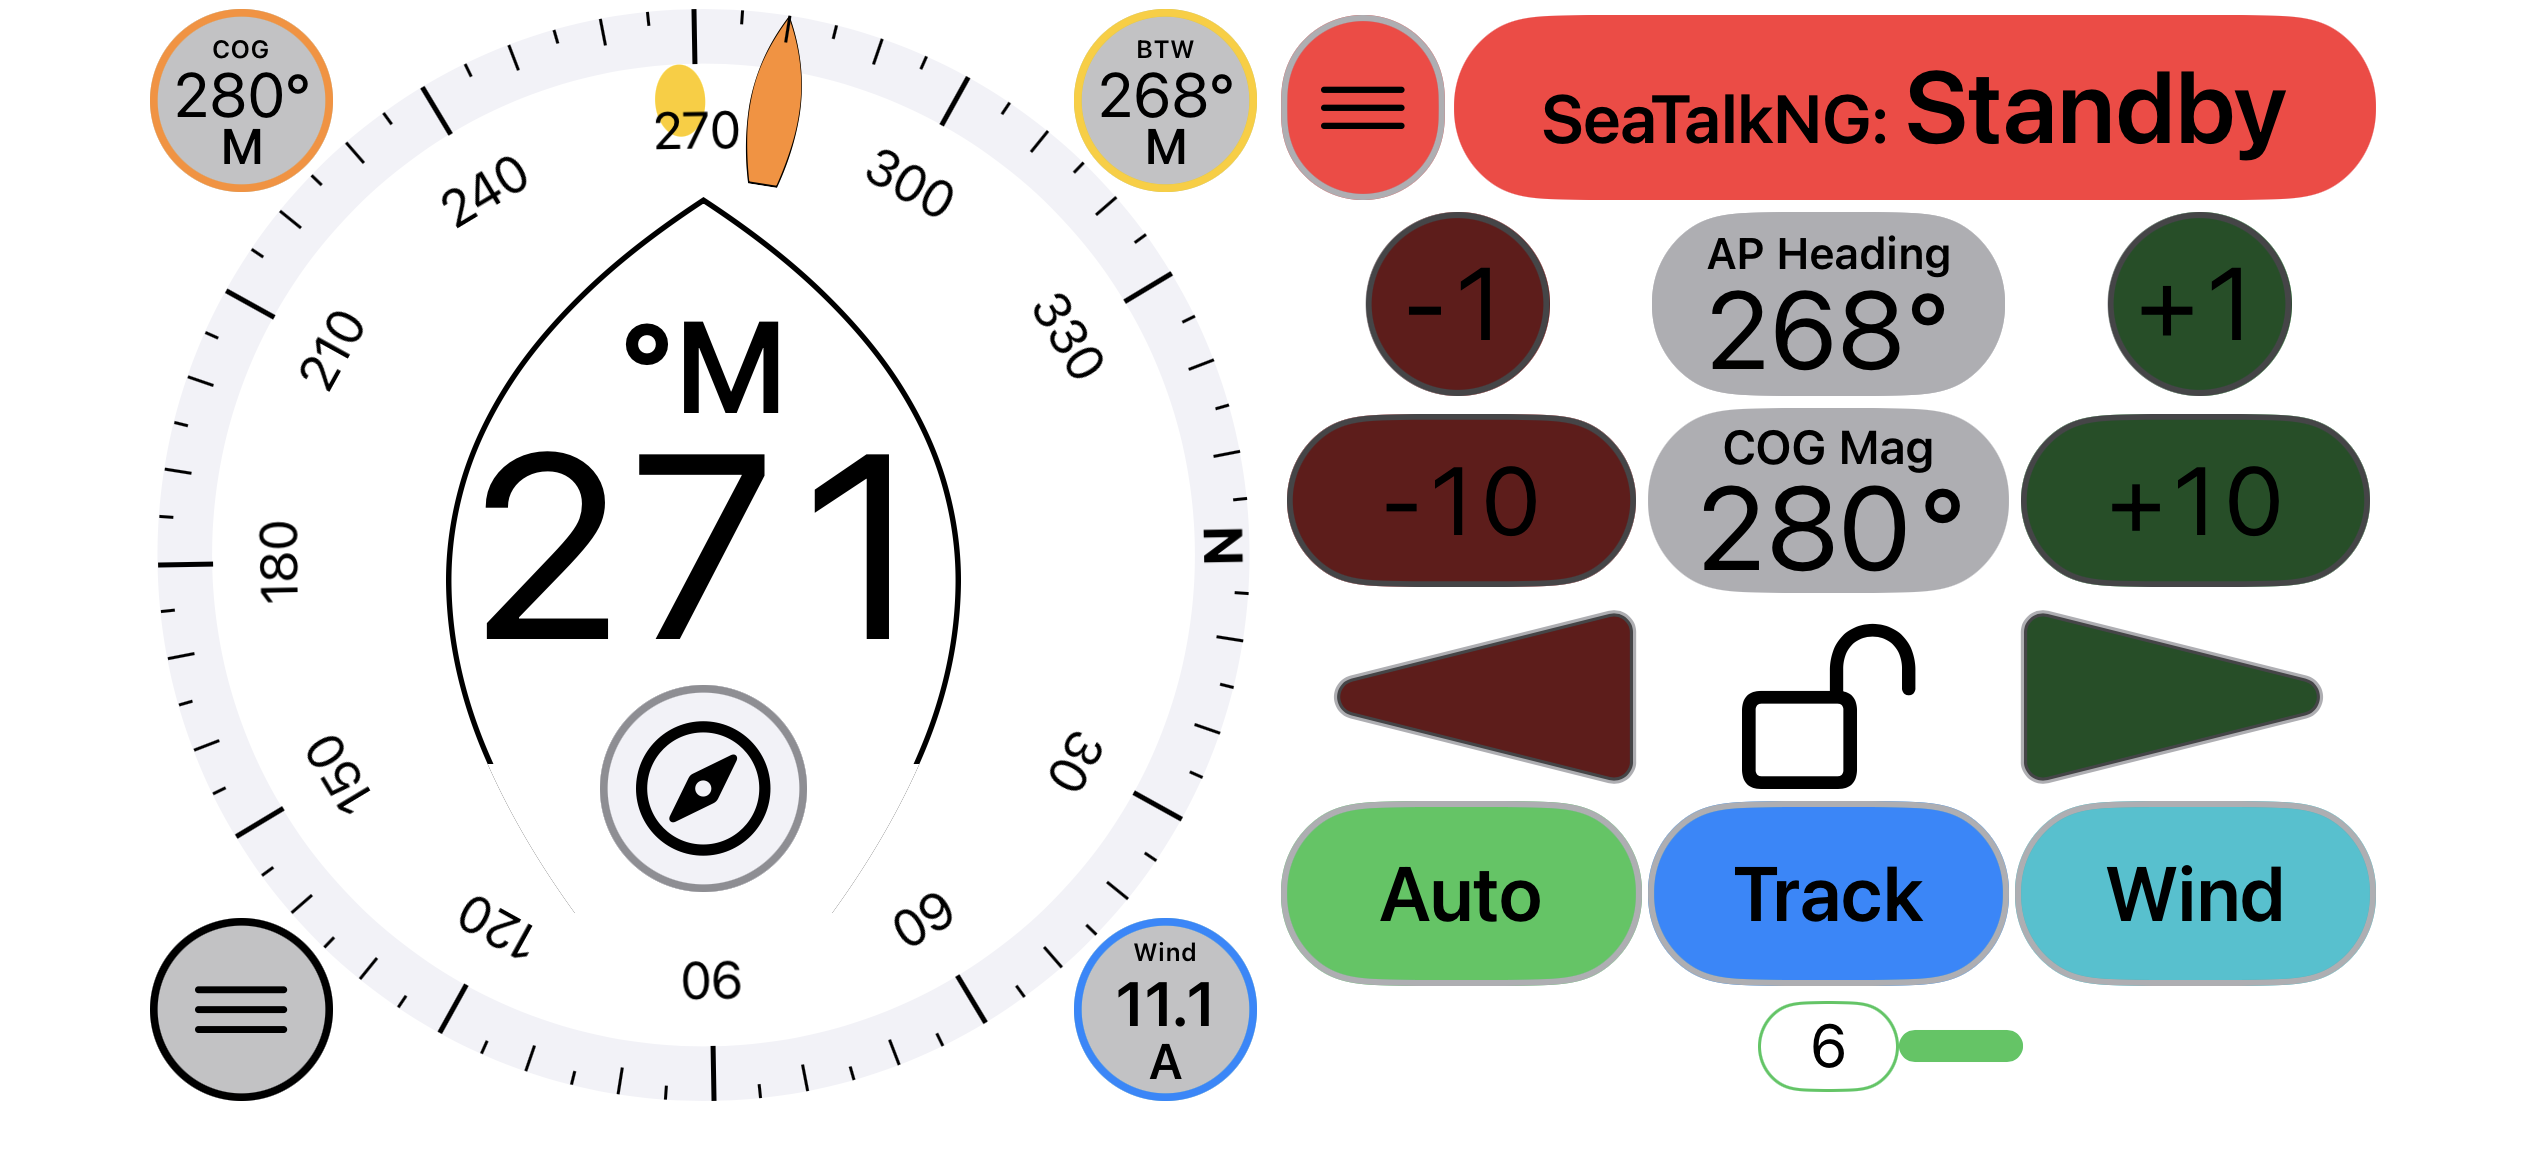
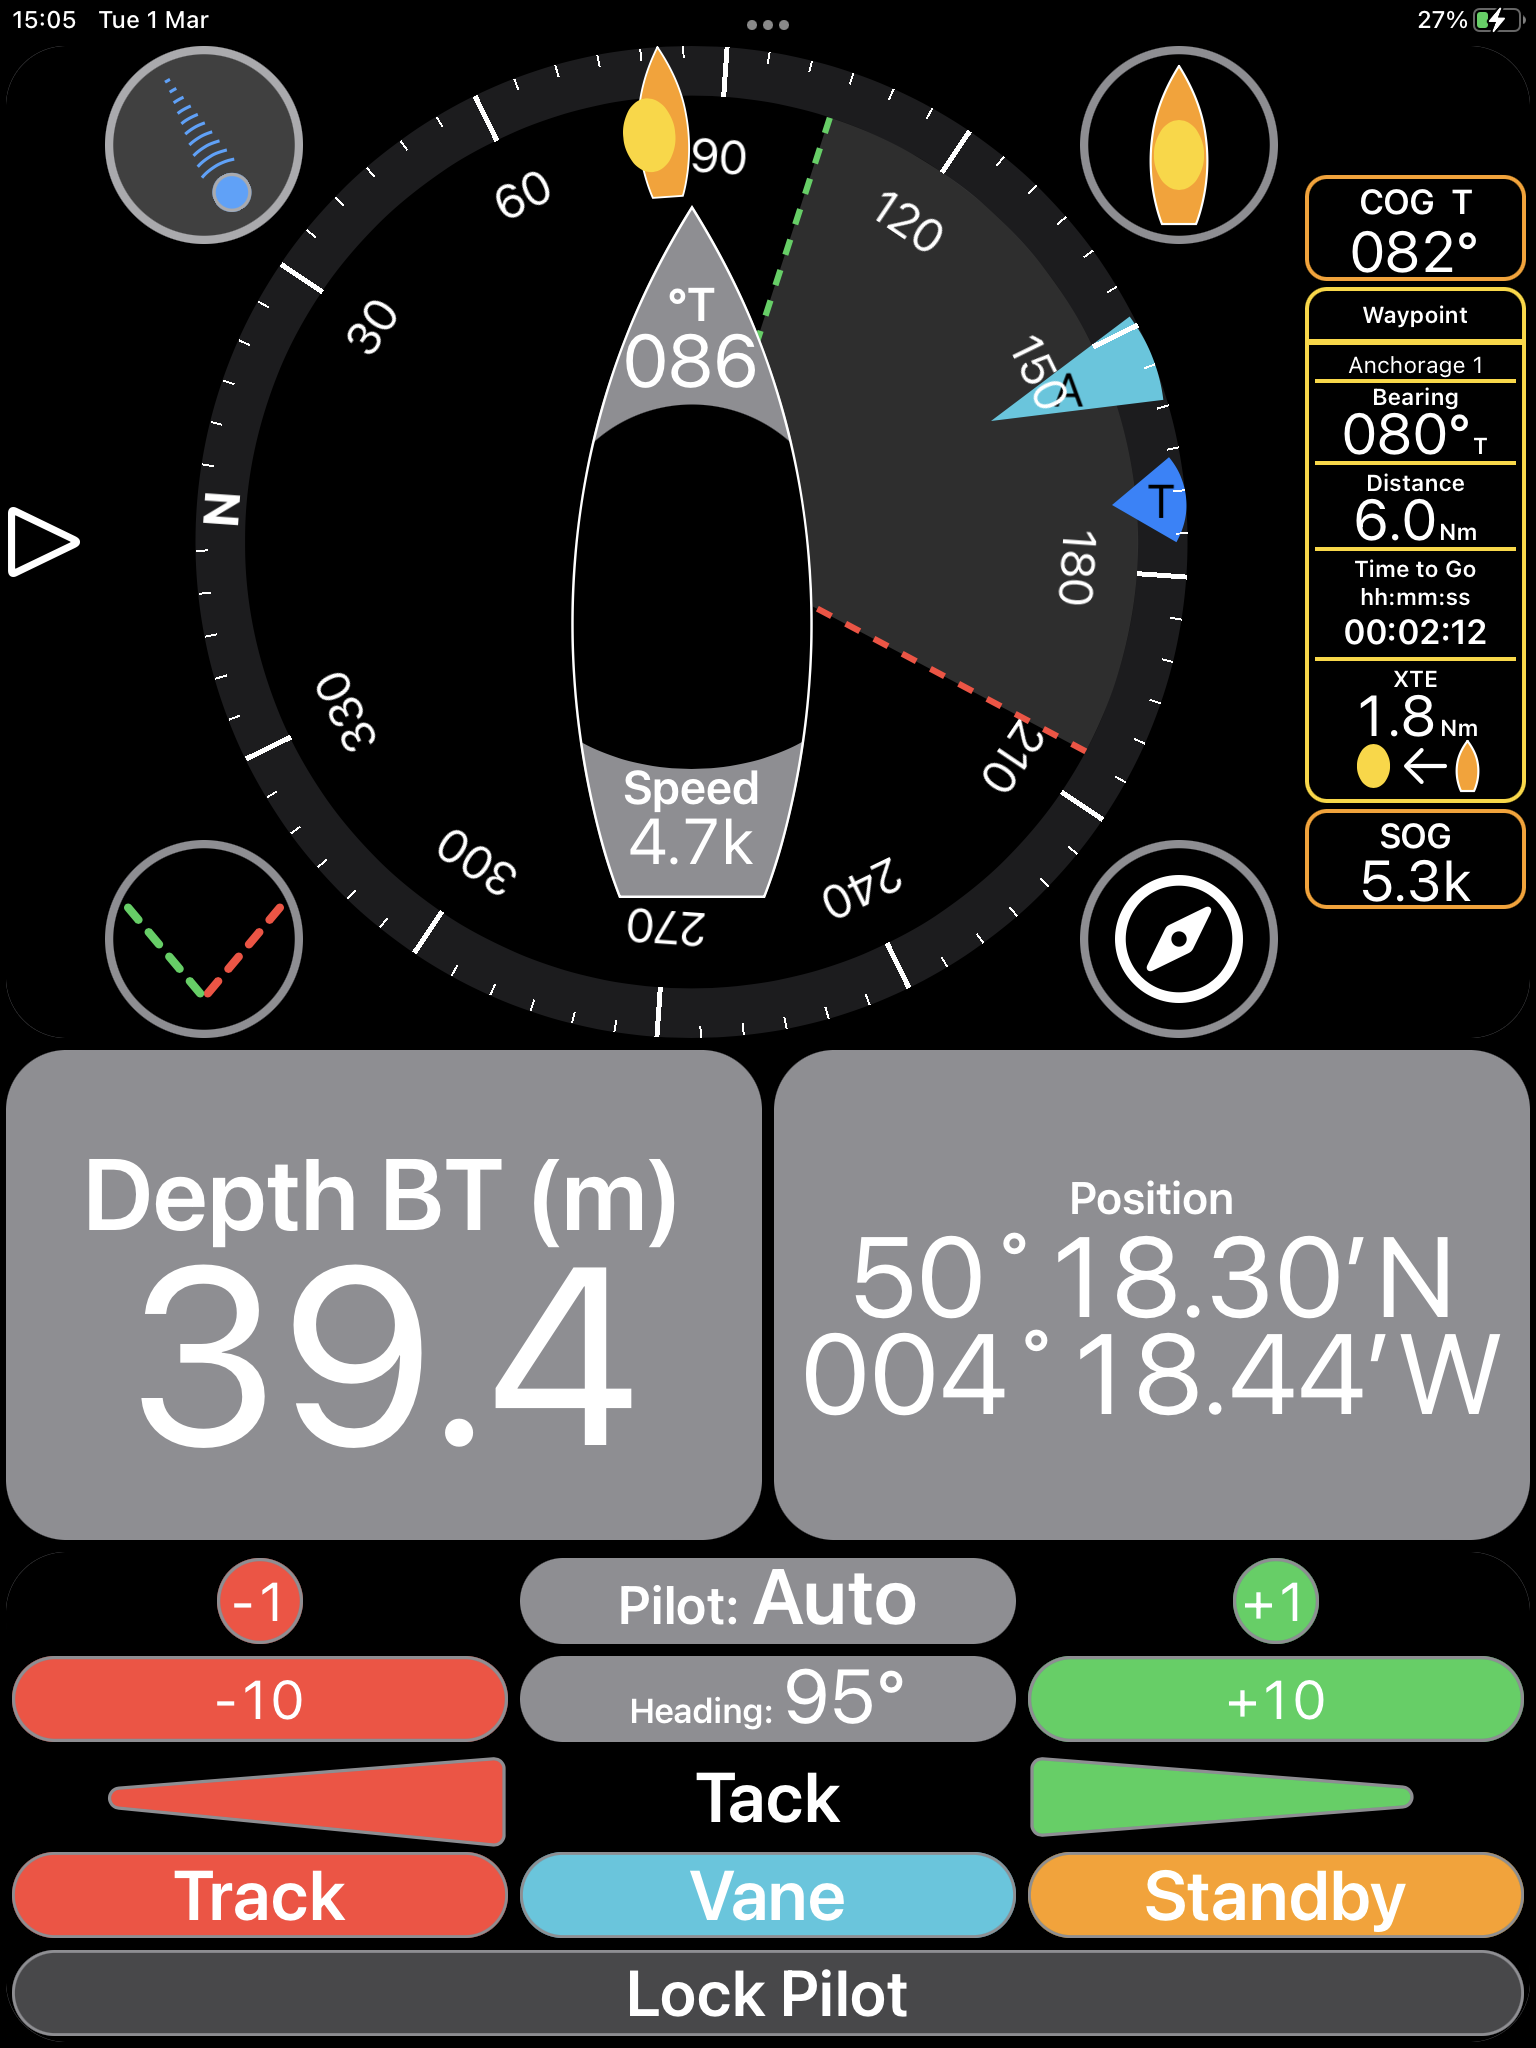
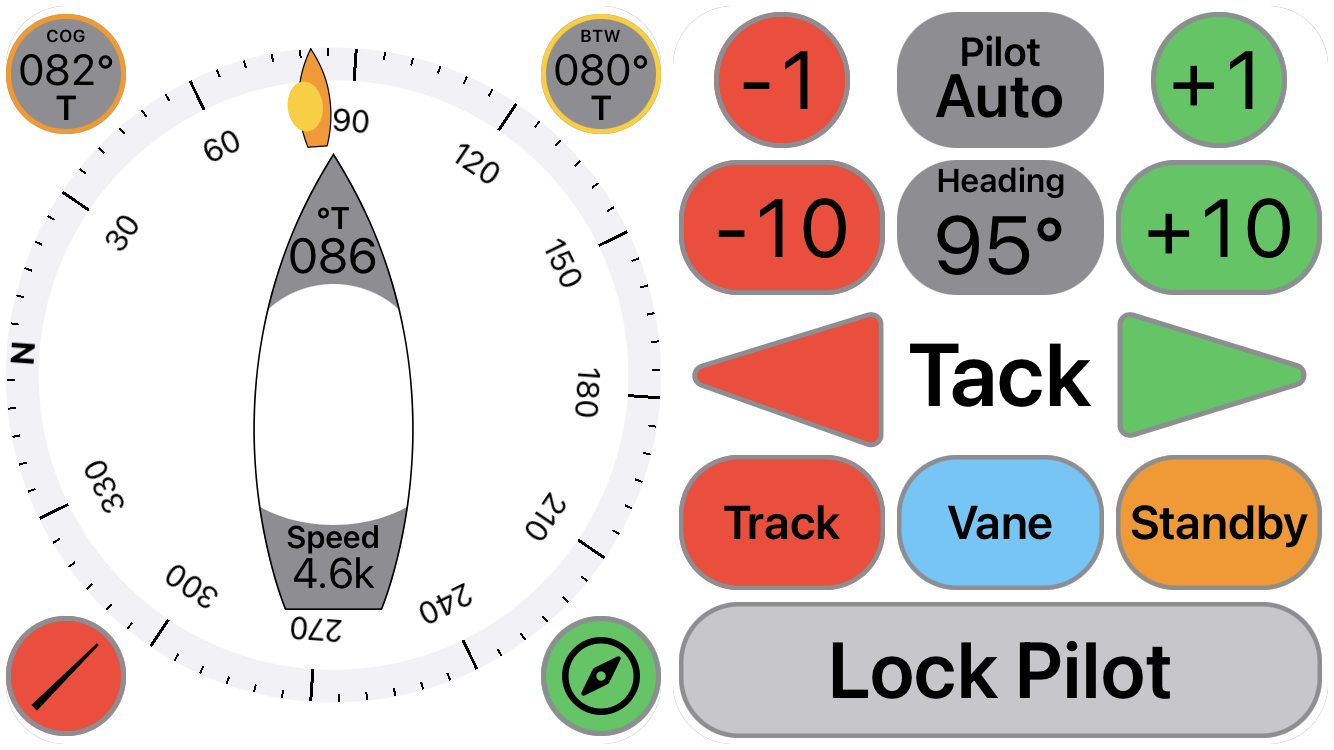
The autopilot Control is shown here combined on a page with a compass.
Combining Views in this way provides a great deal of information and control on a single page. Click the following link for more information on the autopilot remote control.
The Pilot is in Standby mode and the autopilot has a locked heading of 268°.
The Padlock icon (shown unlocked here) is used to disable the heading and mode control buttons. These autopilot control buttons will also be automatically disabled after a user defined number of seconds. This process is implemented to help prevent unintentional course or mode changes.
As the autopilot is in Standby mode only the mode control buttos are enabled.
The circular -1 and +1 buttons change the Pilot locked heading by 1 degree to port or starboard respectively. While the rounded rectangle -10 and +10 buttons change the Pilot locked heading by 10 degrees to port or starboard respectively.
The triangular buttons instruct the Pilot to tack through port or starboard by the Tack Angle setting on the SeaTalk1™ system. Or through a value set in the autopilot menu in the SeaTalkNG system.
Windsail View
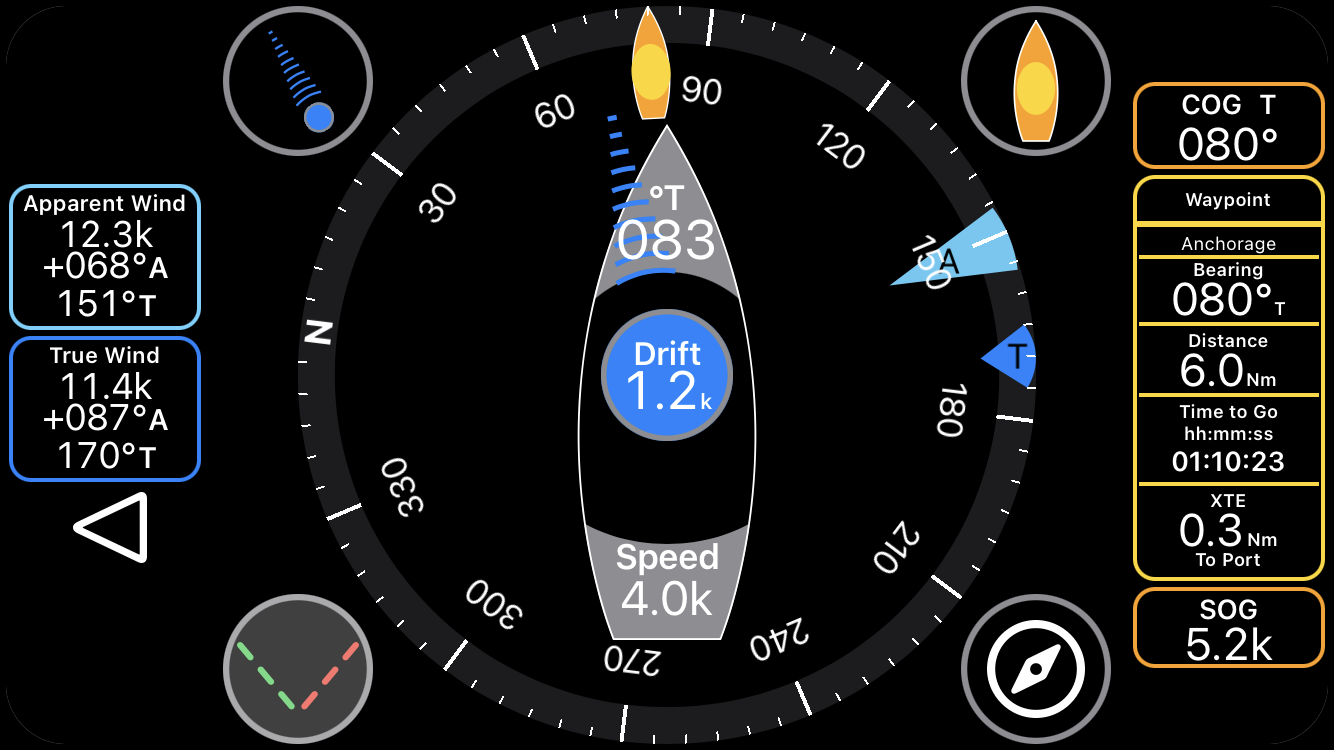
The Windsail View brings together the essential information needed by crew and navigators who wish to monitor the boat’s sailing angles to windward in order to make the best progress towards a waypoint or mark. This View is particularly useful for a short handed crew as the information needed to decide at which point to tack is all on one screen.
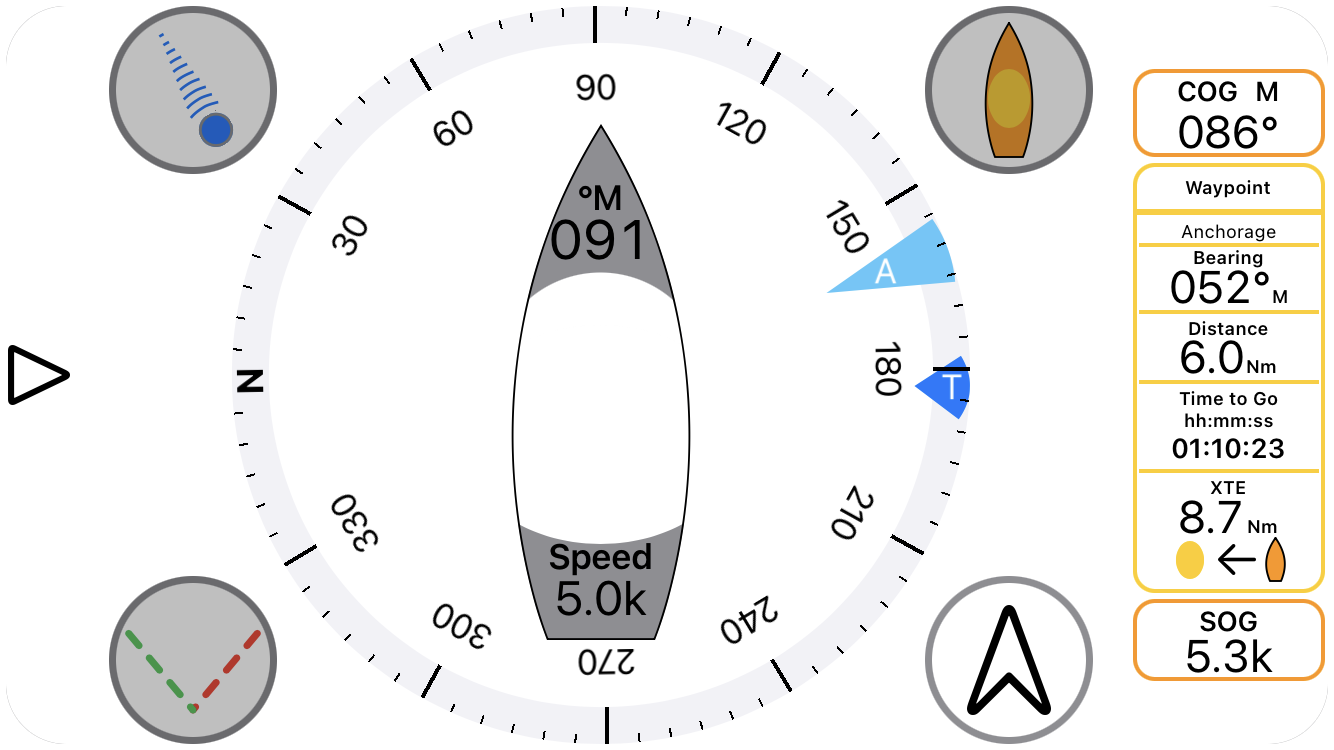
The view is able to present a lot of information and so is directly configurable so that it can display only the information required at that moment. The first view shown is displaying the base level information of the View.On the right hand side of the view is a column of digital data:
- COG - Course Over the Ground
- Waypoint data
- waypoint name
- Bearing to waypoint
- Distance to waypoint
- Time to arrive at waypoint
- Cross track error
- SOG - Speed Over the Ground in knots
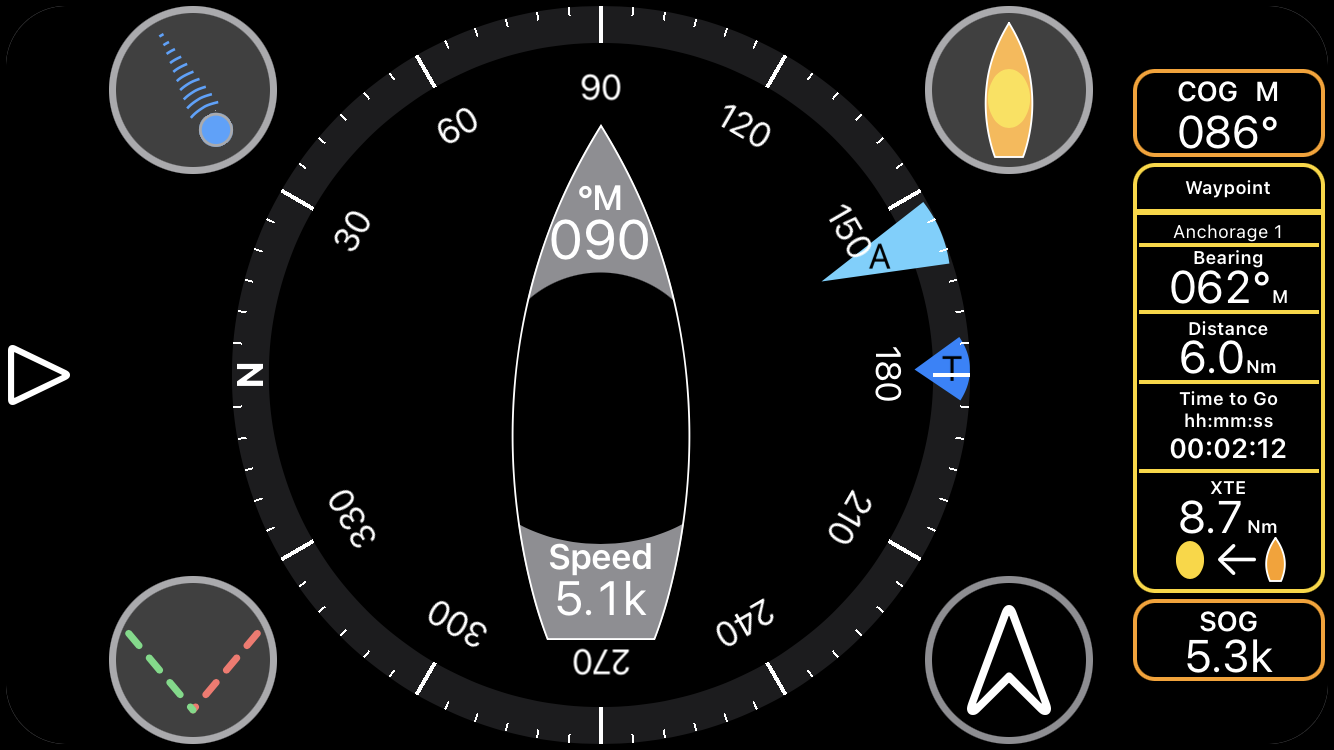
In the centre of the view is the outline of a boat serving as a pointer to the encircling compass rose indicating the boat's heading. The heading is also shown digitally in the pointer's bow. The boat's speed is shown on the pointers's stern.
On the right of the compass rose are two inward pointing arrows The longer arrow in light blue indicates the direction of the apparent wind as felt on the boat. The shorter blue arrow indicates the true or water wind computed by taking into acount the contribution of the boat's heading and speed through the water in creating the apparent wind.
Tapping the rightward pointing arrow on the left of the view brings the left sidebar into view. Tapping the leftward pointing arrow will close the sidebar.
The first box, outlined in light blue shows the the apparent wind speed, direction of arrival on the boat and direction relative to north.

The second box, outlined in blue, shows the the true wind speed, direction of arrival on the boat and direction relative to north.
Tapping this box will toggle the display between True or Water wind and Ground wind.
True/Water wind refers to the wind that would be experienced by a boat making no headway through the water but subject to wind generated by the effect of any current. Thus the boat's closest angle to the apparent wind will tend to be the same on both tacks.
Ground Wind refers to the wind that would be experienced by a boat making no headway through the water and not subject to wind generated by the effect of any current; such as when tied to a buoy (or on the hard). Thus the boat's closest angle to the apparent wind will tend to be different on port/starboard tacks.
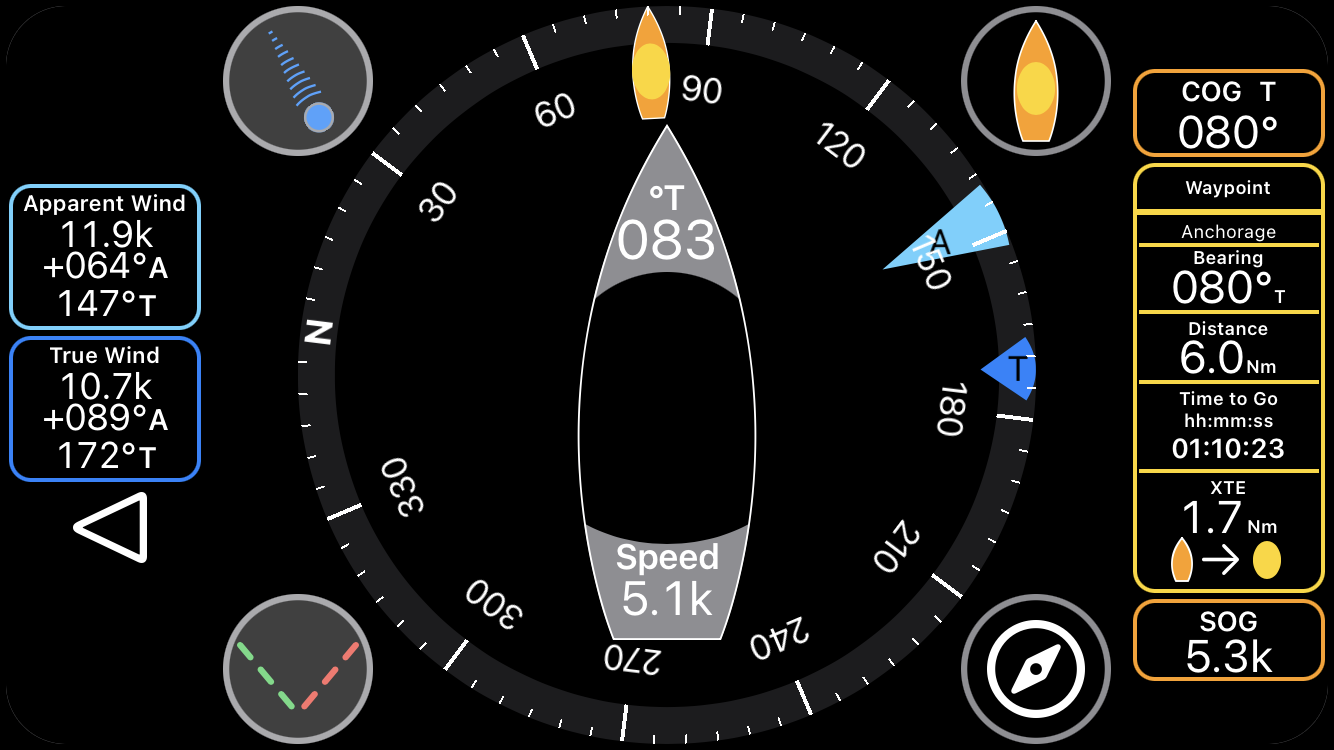
Tapping the button at the top right of the compass rose displays icons for the boat's Course Over the Ground (orange boat) and Bearing To Waypoint (yellow ellipse).
As the ellipse is almost directly over the boat we can see that the boat is currently making the desired course despite being 1.7Nm to port of its original track as indicated in the right sidebar.
Tapping the button at the top left of the compass rose displays icons for the boat's leeway plus Drift and Set caused by water current.
Tapping the central blue button will toggle its display between Set (direction of movement) and Drift (speed of movement).
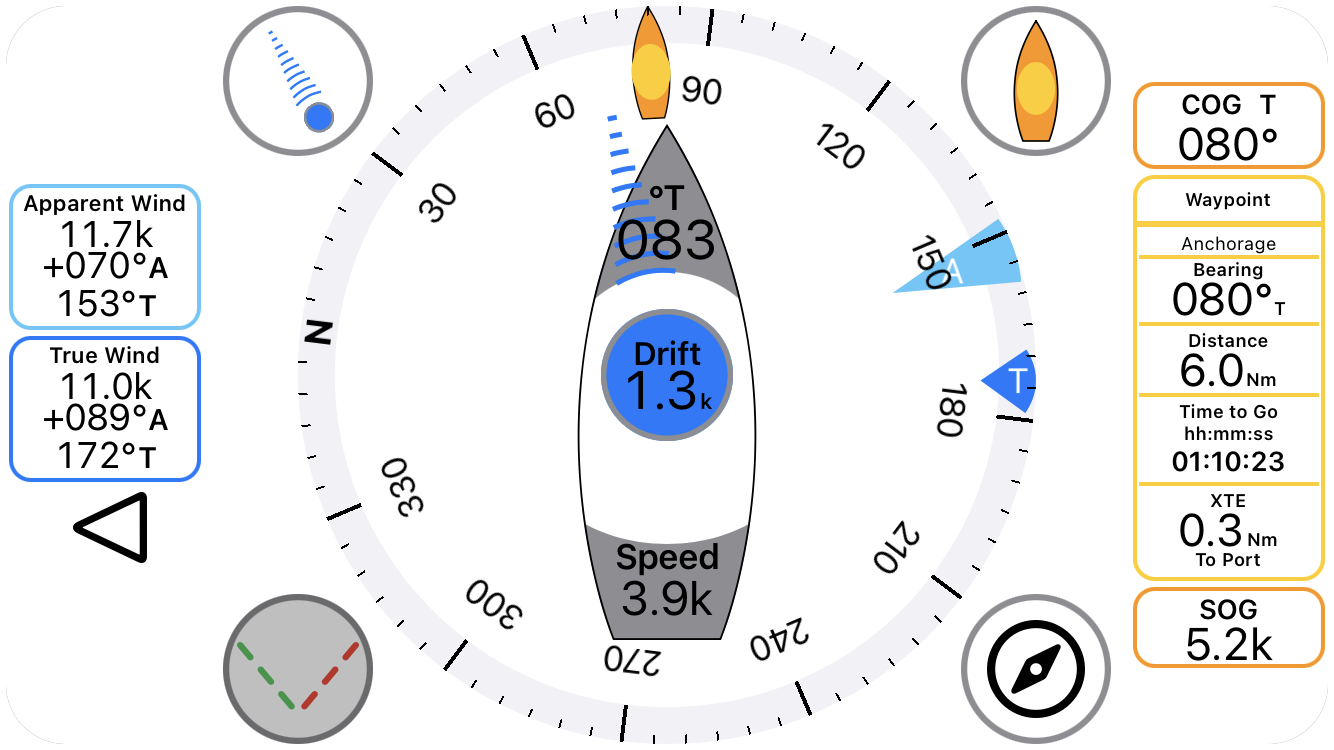

Tapping the button at the botom left of the compass rose displays icons for the boat's best possible angles to the apparent wind on port and starboard tacks.
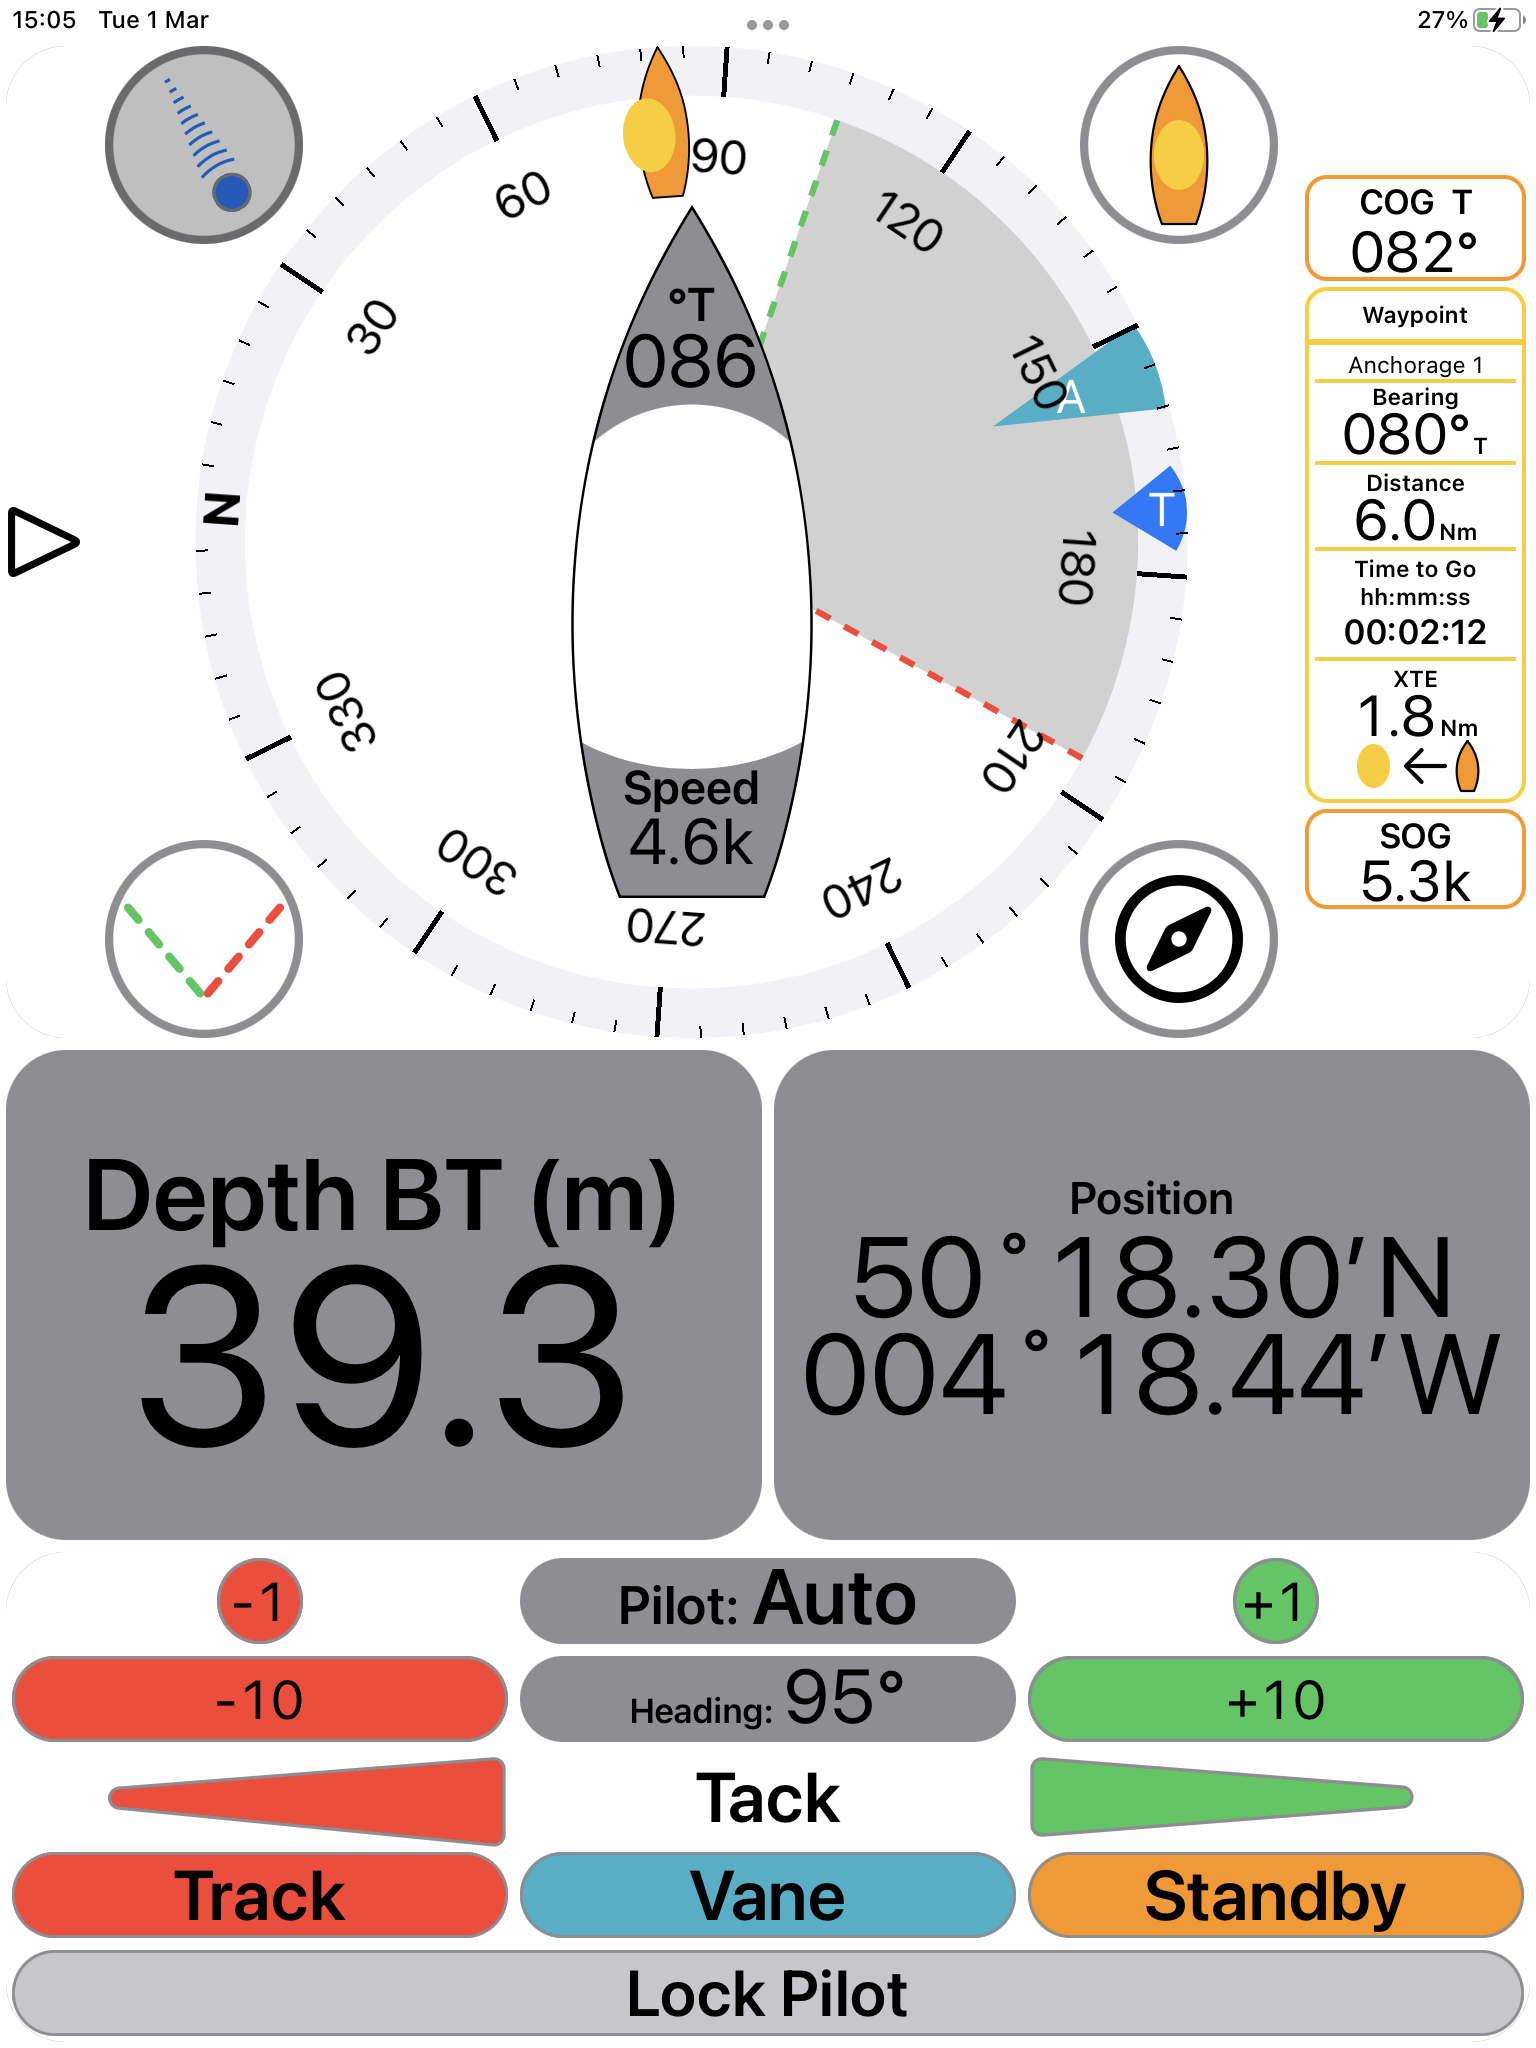
The area beween the two laylines is shaded to indicate that this is the "No Sail" area.
Currently the Layline angles are a user entered value; a long press on the Laylines button (bottom left) will bring up a settings screen. Code is under development to monitor and record actual sailing angles achieved to the apparent wind and allow users to update their assumed values to ones that their boat is actually capable of in the field.
This will lead to bragging rights for some; but not for me I suspect. Nevertheless it will be very useful information for all navigators.
The accuracy and reliability of Windsail's predictions are entirely dependant on the information provided by the boat's instruments. In particular the boat's speed through the water and the wind instruments must be working efficiently and be properly calibrated as per the manufacturer's instructions.
With everything switched on the Windsail display can become rather complex and we have found, that on a smaller device, it is best presented full screen and in landscape mode. All the above screenshots were taken using an iPhone 7.
In working our way to windward we found that the most helpful approach has often been to hide the left sidebar and the drift and Set information until it is needed. This makes the screen much easier on the eye and still retains all the information we require. It then only takes a single tap to bring either into the View when required and another tap to dismiss them again.
When running navCenter on a larger device there are far more options for constructing a suitable page. The image below is from an iPad 10.7 inch.